Training Flip Cards
Trainer Information
How do you train this module?:
The Trainer will teach the Prospect Juicer all 11 steps of the module. If the store has no orders to package, practice with fake orders pouring water in juice/coffee cups.
The training of the module should take 45 minutes following the beneath overview.


1. Intro – The Why
Lean packaging is always super important, but especially when handling pre-orders.
Why? To avoid recovery situations where the guest accidentally drops the to-go bag caused by overweight or sloppy packaging. We need to think smart and remember that the extra 5 seconds we use on doing Lean Packaging can end up saving us time by not having to do the products all over again. Furthermore, it is also convenient for the Guest when all the products are placed nice and firm in the bag with well-placed beverages that won’t tilt when walking away with the bag. It is a bit sad when we don’t take care of the last step of the product making (packaging), after working hard taking the order and making the products.
LEAN PACKAGING = CONVENIENCE = RETURNING GUESTS = HIGHER TURNOVER

2. The Equipment Needed
Introduce the relevant equipment needed for being able to complete a pre-order.
Show & explain the Prospect Juicer following:
- Where to find all to-go material needed

- How to open The List and find navigate the pre-order section.
- Where to find the stapler and clips and how to refill clips.
- Where the printer is located and how to refill paper.

3. The Three Golden Rules
Explain the Prospect Juicer about The Three Golden Rules:
- Number of products In a large bag should never exceed more than 4 juices. In that way, we make sure the bag doesn’t break. Double-bag the items if you are concerned that the bag is going to break. If you are in doubt, use an extra bag.
- When doing pre-orders: if the products require more than one bag, print out the receipt again and staple it on both bags.
- When a guest order exceeds more than two larges bags, e.g. nine juices use a sandwich bread box to place the order in.


4. The Extra Inch
Show the Prospect Juicer what the Extra Inch means and why it is nice to do for our guests.
The Extra Inch is about what we put into the bag making the order feel complete and well-suited for To-Go and delivery.
Sandwich: Add one extra napkin
Juice & shots: Add 1 extra ice cube to keep the juice cold
Coffee: Make the coffee extra warm and add stirs and sugar

5.Type of Orders
When sending out orders, the Send Out will pay close attention to what type of order it is. It is important that the correct procedures for the type of order are followed, to offer our guests a convenient experience whenpicking up their order.
In Joe we have three different channels for receiving orders:
1. In-store (POS)
2. Pre-order (App)
3. 3rd-party delivery
In addition, the Guest can decide whether they want their order to stay or to go. All orders To-Go must follow the Lean Packaging Procedures. App Orders (to-go) & 3rd Party Delivery must be placed on the App Pickup wall at all times. All other types of order should be sent out at the Send Out area.


6. Product Packaging
Juice
Explain the Prospect Juicer how to pack a juice properly and the reason to follow the sequence for packaging a product.
Write what each product is in following situations:

*When juices are placed in a bag, REMEMBER to add the needed straws.

Sandwich
Explain the Prospect Juicer how to pack a sandwich properly and the reason to follow the sequence for packaging a product.
- Put the sandwich in a Sandwich Box ( DO NOT DOUBLE WRAP)
- Mark what each product is on the sandwich box.
- Add one napkin with each sandwich box in the bag.


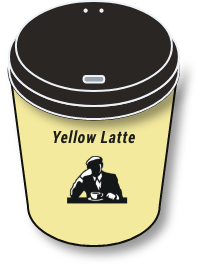
Coffee
Explain the Prospect Juicer how to prepare a coffee right and the reason to follow the sequence for packaging a product.
- Write what each product is on the cup.
- Make sure that the lid are tightly on.

Salad
Explain the Prospect Juicer how to pack a salad properly and the reason to follow the sequence for packaging a product.
- Mark which salad it is on the salad lid.
- Add one extra napkin and a fork per salad.


Bowl
Explain the Prospect Juicer how to pack a bowl properly and the reason to follow the sequence for packaging a product.
- Write what each product is on the bowl.
- Add extra napkin and spoon per bowl.


7. Packaging Overview
Explain the Prospect Juicer how to doing pre-orders and 3rd-party deliveries, use the following matrixes to package the products in the right way. It is important that the Prospect Juicer follow these guidelines, in order to create a worldwide alignment and to secure a high level of convenience for our guests.
- A sandwich should be packaged in a sandwich box at all times.
- A counter product should be packaged in the counter product box at all times.
- A small bag can contain up to 4 sandwiches.
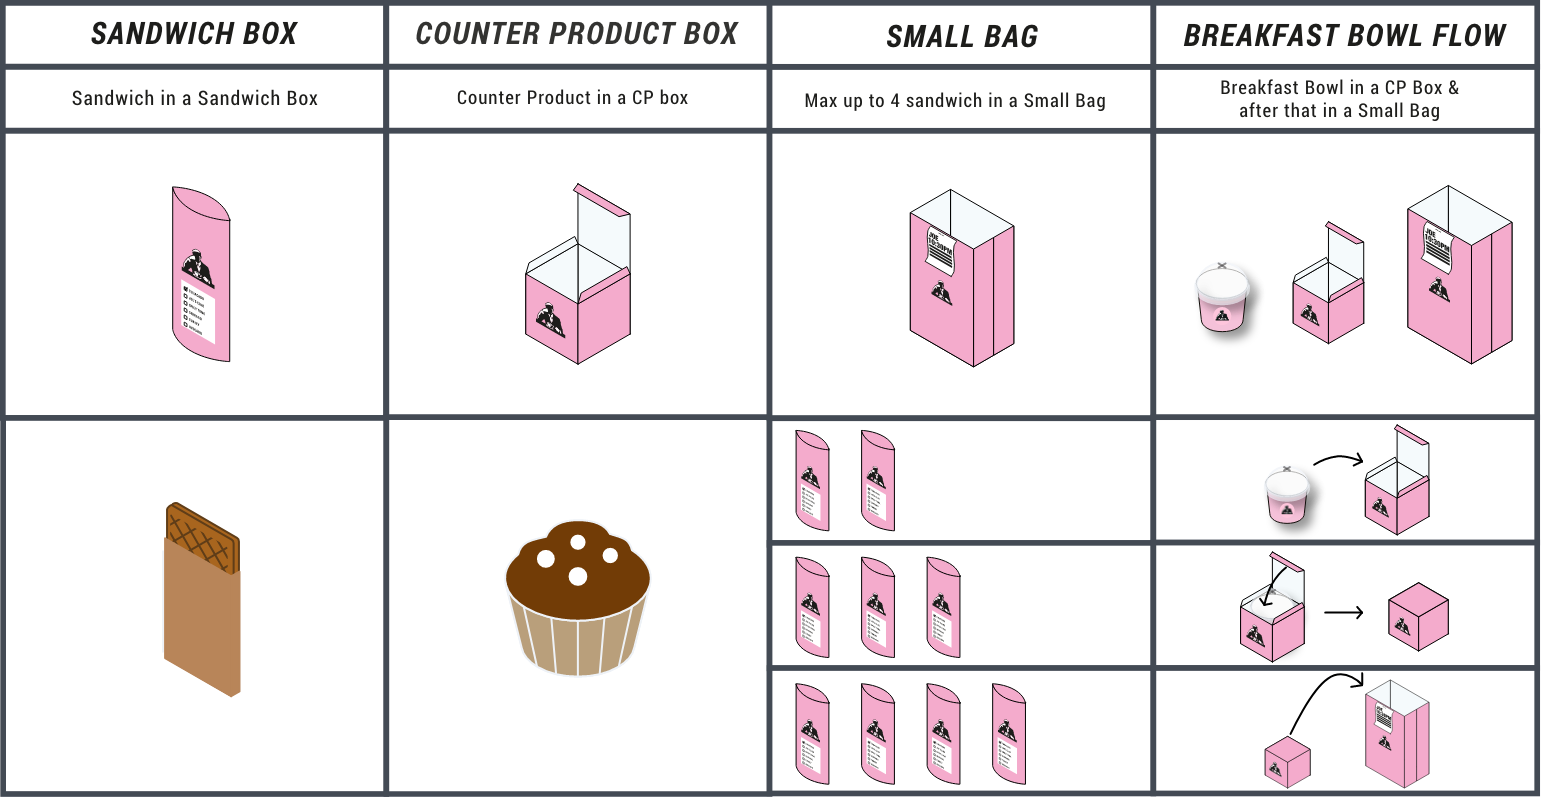
How to package a breakfast bowl:
1. Place it in the counter product bow.
2. Secure the lid are placed correct.
3. Place it the box in the bag.

8. Small & Large Bag Combinations
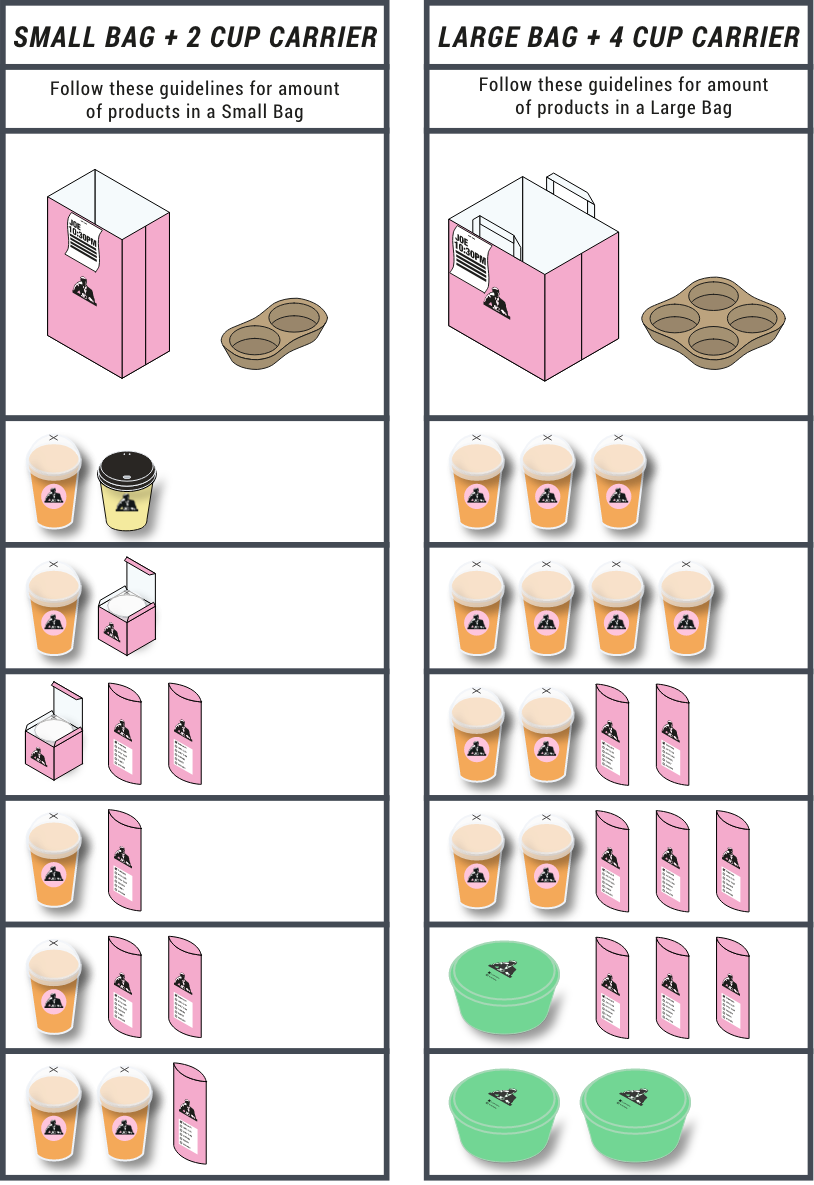
- Familiarize yourself with the different combinations that are allowed for each of the 2 bags when accompanied by a cup carrier.
- It is important that these requirements are not exceeded as it will either put strain on the bag or look messy.
- Never use a 2 cup carrier in a large bag, as doing that will make the products within the bag unstable and you will risk that the juices fall over when moved around.

9. Out of Stock
Explain and show the Prospect Juicer how to tap an ingredient out of stock and why it is important we tick off out of stock ingredients, so a guest wont get a bad experience.
If the Bar Manager is not on shift the moment an ingredient is running out, he/she should be notified asap as well. Then it is the Bar Manager’s responsibility to update the Out of stock list, when the ingredient is back in stock, so the product will be available for pre-orders again.

10. Pre-Order Workflow Overview
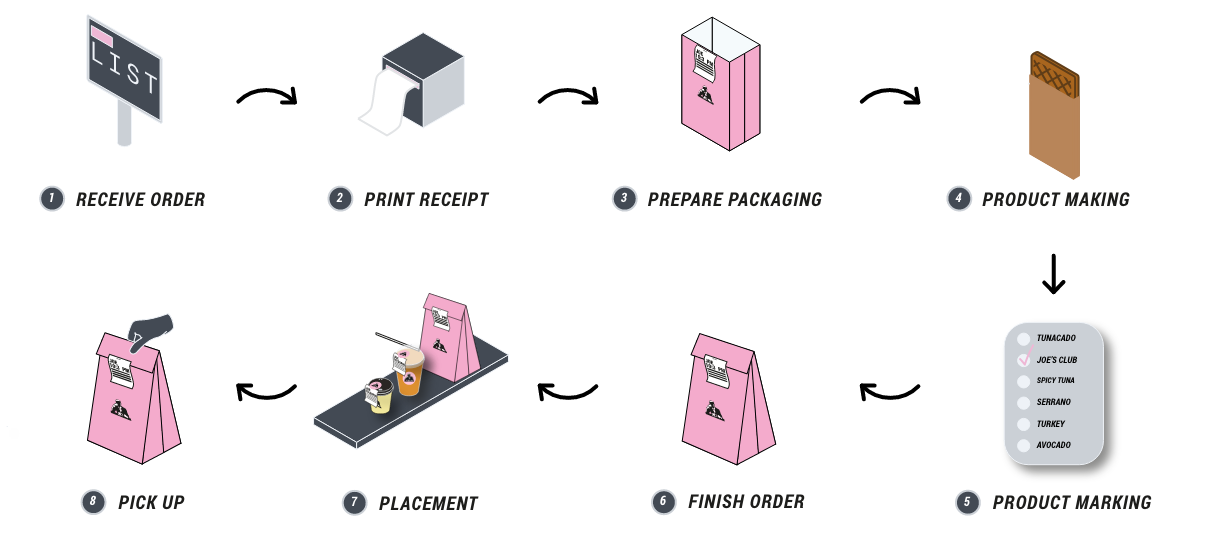
- Receive Order: You can tell the difference between a normal order and pre-order by the iPhone icon found I the bottom of the order or the notifying sound.You can tell the difference between a normal order and pre-order by the iPhone icon found I the bottom of the order or the notifying sound.
- Print Receipt: When the pre-order is the next to be made, tap the pre-order icon and the receipt will be printed out with name + products.
- Prepare Packaging: If a bag is needed, prepare the to-go bag for the pre-order. Take the pre-order receipt and staple it to the bag.
- Product Making: Start making the product for the pre-order just like a regular order.
- Product Marking: Be sure to mark the finished sandwiches and salads before placing them in the bag, so the guest isn’t doubtful about the product.
- Finish Order: If the pre-order doesn’t require a bag, place the receipt one the product. The juicer who delivers the last product to the pre-order is responsible for tapping out the entire order. Remember to follow lean packaging procedures.
- Placement: When the pre-order is done, the Send Out Juicer is responsible of double checking the order, tapping it out on the List and placing the order on the Pick Up Wall. Now the guests receives a notification that the order is ready.
- Pick Up: The guest picks up their order.
*If the store has more than 4 Juicers on shift, then a designated Pre-order Juicer will be responsible of collecting all orders in the bag with napkins, straws, sugar, lids etc. and placing the order correctly on the Pick-up wall.

11. Pre-Order Placement Overview - App Pick-Up wall
When we are preparing and sending out a pre-order, we follow the procedures in the overview below. It contains all possible out comes on the App Pick-Up wall.
- App Order We Don't Package in a Bag
- If the App order is stating to-stay (phone icon) the order should not be packed.
- If the order is marked as to go, but is 1x beverage (Juice/shake/coffee)place it directly on the App Pick Up wall. Place just the tip of the straw in the juice, so the straw doesn’t get soaked. Make sure to place the receipt visible for the guest.
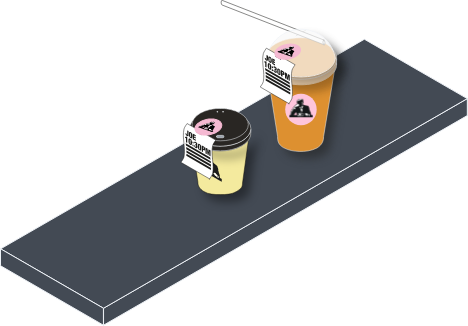
- App Orders That Are Packaged in a Bag
In all other cases than the above, the order is packaged in a bag.
- Double beverage orders are placed in a 2-cupholder and placed in a small bag with straws.
- 3-4 beverage orders are placed in a 4-cupholder and placed in a large bag with straws.
- For further information about packaging, check out the above Lean Packaging matrix.
3rd- Party Delivery = Always Packaged in a Bag
All 3rd-party deliveries such as Wolt, Uber Eats, and Deliveroo should be handled the exact same way as a packaged Pre-order, no matter what the order is. This means that all orders, also single item orders need to be packaged. The reason being that we need to be aligned with all 3rd-party delivery services and they can only handle orders being ready for pick-up in a bag!
Explain and show the Prospect Juicer how to use and navigate our 3rd-party iPads if the store has one:
- Introduce how to navigate the platform
- Show the prospect how to tab out ingredients (out of stock)
- Stress the fact that they should tab out ingredients immediately when out of stock (like the List)
- Any other key parts of the delivery platform tablet?


12. Order Channel Overview
We have 3 different ways to order. Each method also results in specific ways to execute and send out the order:
- In-Store POS Order
- To-Stay orders are packaged in normal packaging without a bag.
- To-Go orders are packaged in a bag at all times.
- All orders should be placed at the send out area. No matter if it is To-Go or To-Stay.
- App Order (Pre-order)
- Single beverage orders: juice and coffee should not be packaged in a bag, but in their To-Go cup.
- Bowls and salads have to be packaged in a bag at all times.
- All orders have to be placed at the App Pick-Up wall no matter if it is marked as To-Go or To-Stay.
- 3rd Party Delivery Orders
- Every single order has to be packaged in a bag, no matter what the product is (e.g. 1x sandwich = sandwich box + bag).
- All orders have to be placed at the App-Pick-Up wall.

Train how to execute a pre-order
Let the Prospect Juicer perform a pre-order. Make the Prospect Juicer say out loud every step he/she is doing in the sequence in order to remember each step. Make sure the Prospect Juicer is executing at least 5 pre-orders before the shift is over.
TEACH THE TEACHER
Recap by the end of the module using “teach the teacher”. The Prospect Juicer needs to explain
what to do at each step of the sequence:
• The Equipment you need
• Explain the Three Golden Rule
• Explain what the Extra Inch means
• Show how to prepare all products
• Explain the Packaging Overview
• Show how to pack orders.
• Receive Order
• Print Receipt
• Prepare Packaging
• Product Making
• Product Marking
• Finish Order
• Placement
• Handover
• The difference between order being packaged and orders that don’t
• How to place all outcomes of pre-orders on the App Pick-Up wall
• The difference between pre-orders and 3rd-party deliveries


