
Execute re-stock

Opening Shift
1/
10
How to Train
Open Shift
When working an Opening shift, we prep the ingredients and prepare the store for the day. Follow the steps below when carrying out an Opening Shift training:

Step 1: Knowledge in Attensi
Certify in the "Opening Shift" section in Attensi until the dotted line:
- Video: Introduction to Opening Shift
- Game: Opening Shift
- Video: RiskProof App Introduction
*Franchise Markets: Trainee to study e-Campus module
Step 2: Training On-Top
Teach the practical procedures on shift by covering all areas of this training module using the training tag: Opening Shift on WP2
Step 3: Practice On-Shift
The following days, the Trainee practices all training goals until they are ready for the validation.
Step 4: Opening Shift Validation
Carry out a module validation to measure performance and celebrate growth. Plan a validation shift using the validation tag: OPENING SHIFT VALIDATION.
Part 1: Knowledge Validation in Attensi
The Juicer will start out by certifying in the validation modules in Attensi:
- Opening Shift Checklist
- Opening Shift Validation
Part 2: Practical Validation on shift
The Juicer will show they are capable of executing their theoretical knowledge in practice.
Part 3: Register on WP2
If the Trainee passes, register the validation as passed in WP2 and move on to the next module. If the Trainee fails, grade the validation as failed in WP2. Then, share improvement points, allow for more “Practice On Shift” and plan a new Validation Shift.
%20(Frederiksberg)%201%20(1).png)
Introduction
OPENING:
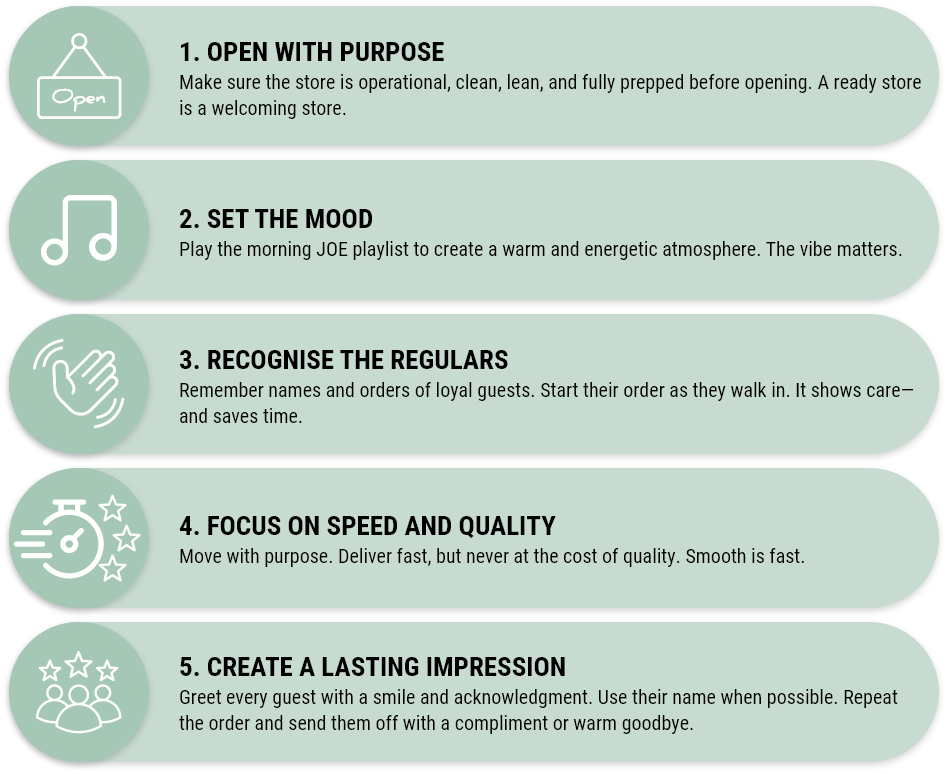
Learning how to carry out an opening shift is a crucial step to becoming a Juicer. The key take away from this module is: “PREPARATION IS KEY TO SUCCESS”. What we do in the morning hours is important for the remaining hours of the day. If we prepare the store well and maintain this level both before and after the typical lunch rush, it will have a positive effect on the periods later on in the day. The main objectives for the opening Juicers are to make sure that the ingredients are prepped, the bar is setup correctly, the store is clean and to make a smooth handover for the team meeting in later on the day.
Hygiene
When learning the hygiene procedures of the store, two main areas are important:
Prep Hygiene = All the Hygiene procedures related to prepping the store
Opening Hygiene = All the Hygiene procedures related to opening and preparing the store for the day
Cleaning fruit and vegetables
Because bacteria can be transmitted to our store on fruit and vegetables, we must clean them before use. All fruit and vegetables (including those with skin such as avocado, banana, and grapefruit) need to be cleaned to prevent dirt from the skin contaminating once placed in a canteen.
It is very important to pay extra attention to the cleaning of dill, spring onion, basil, and celery as they are very likely to have been contaminated in their production or transport.
When cleaning the fruit and vegetables it is important to use cold water as hot water can promote bacteria growth. Mould or rot can be very harmful if consumed, if there are any signs of rot or mould then the affected food products must be thrown immediately out and recorded on the wastage list.
Food Prep
Cross-contamination is the transfer of bacteria and allergens between different food groups. This is a high-risk area for food retail businesses including Joe. Cross contamination is the transfer of pathogens and allergens from one food to another.
This cross contamination can for example be:
Direct
The food touching one another and becoming contaminated
Indirect
Through equipment, utensils or team.
To reduce the risk of cross-contamination we must:
- Ensure allergens (milk, almond, celery, fish, almonds) are stored away from other foods and use separate utensils.
- Keep unwashed vegetables away from ready to eat food
- Wash chopping boards and knives regularly with brush, hot water and soap and then disinfect in the high temperature sanitiser
- Use separate clean canteens to store ingredients with only one ingredient per canteen
- Wash hands regularly and between handling unwashed vegetables and ready to eat food
Board Prep Procedures
Knives and chopping boards need to be cleaned after prepping each ingredient. To speed up the prepping process have sufficient clean boards and knives available to prepare each ingredient. This does not mean you need a certain number of boards, rather that there are enough ready for use, in the high temperature sanitiser and drying.
Pesto, Tuna Mousse & Egg Preparation
Pesto
Use a clean blender that has been disinfected in the high temperature disinfector to blend the ingredients.
Pour the pesto into clean, disinfected pesto bottles
Place the bottles into the refrigerators
Tuna Mousse
Only chilled mayonnaise and chilled tuna (below 5 degrees) can be used
Mix all ingredients in a clean, disinfected metal canteen using a clean, disinfected spoon
Pour the finished tuna mousse into new clean, disinfected metal canteens and cover with a lid. Do not fill above the indent in the canteen
Place labelled canteen in the fridge within 5 minutes of making mixture.
Egg mousse
Only chilled eggs and chilled mayonnaise can be used
Check egg is within 1 days of ‘use by date’ or ‘once opened’ date marked upon it (for example, if use by date 11th Dec, latest day the ingredient can be used is the 10th Dec)
Check mayonnaise is in date
Mix chilled egg, chilled mayonnaise and other ingredients in clean canteen using a clean spoon. Do not fill above the indent in the canteen
Label canteen lid with date label with day of prepping plus one day. For example, if made on Monday, write Monday as the ‘Date Made’ and write Tuesday as the ‘Use By Date’ (meaning use by end of Tuesday night)
Place labelled canteen in the fridge within 5 minutes of making mixture.
Filling Canteens
When placing food prep in the canteens, it is important not to fill above the maximum line (the indented line) as it will not keep the correct temperature if overfilled.
The Food Cooling Grave
The following food products must be stored in covered metal canteens in the cooling grave:
- Chicken
- Turkey
- Serrano
- Tuna Mousse
- Mozzarella
- Always keep the lids on the canteens as much as possible throughout the day, as this will help keep the items within the correct temperature range.
Defrosting frozen items
- Frozen turkey and chicken may only be defrosted in the fridge in canteens
- Bread and cakes can be defrosted at room temperature in a plastic canteen
Temperatures
Temperature control is a vital part of food safety, if food is not stored and the correct temperature it will allow for the multiplication of pathogenic organisms and may lead to customers becoming ill and suffering from food poisoning.
Fridge and freezer operating temperatures
Temperatures on all fridges and freezers are to be recorded using RiskProof so that we ensure all temperatures are correct and that we have a record that we have been checking as required by law. If a recording returns an ‘adverse finding’ message, follow the instructions provided or from your manager.
Even though we have regular checks during the day it is important to monitor all fridges and freezers throughout the day to ensure that the power has not accidentally shut off or a unit has failed. Keep an eye on the fridge and freezer dials and be alert for signs of failures such as food defrosting, air feeling warmer, product being runnier.
Freezers
All Markets Colder than 18°C – 0°F
Fridges
France, Norway, Singapore, and Iceland 0°C – 4°C
Denmark, Sweden, Germany, Netherlands, Korea, Hong Kong, UK, Australia 0°C – 5°C
USA 32°F – 41°F
Product temperatures
Temperatures need to be measured using a pyrometer. It is never okay just read the temperature displays on the fridges and freezers as this does not give the temperature of the products.
How to take product temperatures:
Hold the pyrometer 10-15cm from the product and press the trigger
Point it directly at the actual product (not the packaging)
Acceptable temperature ranges for chilled goods are:
France, Norway, Singapore, and Iceland between 0°C and 4°C
Denmark, Sweden, Germany, Netherlands, Korea, Hong Kong, UK between 0°C and 5°C
USA between 32°F and 41°F
If the fridges and cooling graves cannot maintain the correct temperatures, follow the three-hour rule.
FIFO
First in first out – FIFO is fundamental for a healthy stock handling. FIFO means “First In, First Out”. FIFO is the goods “workflow” from when we receive our goods, to which order we use them. It is important to make sure you stack up the oldest food items on top / in front. Following FIFO helps us ensure that only fresh food is used in our products.
Day Dot Stickers
Day Dot stickers are used to record when a prep has been made and how long it can last. Once the use-by date has been passed, the prep must be wasted.
Bar Display
Fruit and vegetables must not be placed in the bar display.
Other Pests
Mice, cockroaches, and rats
Daily morning checks for any sign of pests must be performed every opening. Any sign of cockroaches, mice, rats, or other pests must be reported to management immediately for them to take appropiate actions.
All food and surfaces which may have been contaminated by pests must be either thrown out (food) or cleaned (surfaces).
Fruit Flies
Keeping a high standard cleanliness, especially around the juice station, fruit baskets, and drains in the sinks, will help prevent fruit flies from appearing. Make sure dirty cloths and dishtowels are removed from the bar area every evening will also help.
If fruit flies appear then try and identify where they are gathering.
Typically, this will be around
- Bananas
- Pineapples
- Ginger
- Carrots Bags
- Apples (in the baskets)
Once you have identified the area, dispose of all food products which have been directly contaminated by the flies. Thoroughly clean, sanitize and dry the area the fruit flies are gathering. Check underneath equipment and for spillages of juice, cover fruits and vegetables that are outside the fridge. If this doesn’t fix the problem, then fruit fly traps can be ordered. These traps can only be used between close and opening i.e not during opening hours.
IMS Sheets
Find your markets IMS Sheets here
Validation Checklist
Find your markets Validation Checklist here
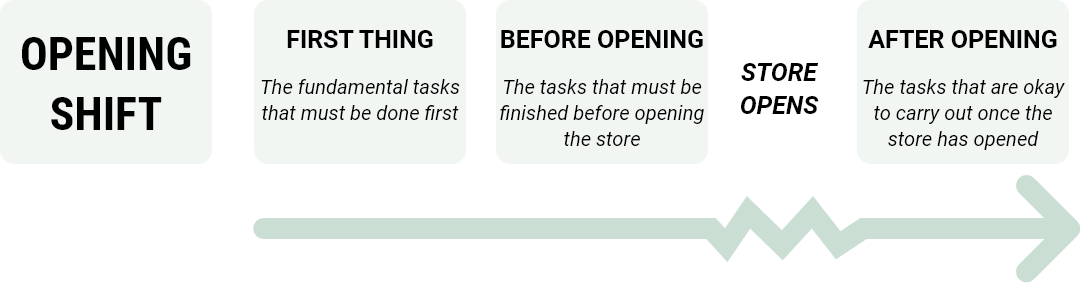
1. First Thing


Checklist
Find your markets Checklist here
IMS Sheets
Find your markets IMS Sheets here
Validation Checklist
Find your markets Validation Checklist here
2. Before Opening


.png)


IMS Sheets
Find your markets IMS Sheets here
Validation Checklist
Find your markets Validation Checklist here
3. After Opening


How to videos

IMS Sheets
Find your markets IMS Sheets here
Validation Checklist
Find your markets Validation Checklist here
RiskProof Overview
Riskproof is our store’s safety system we use to make sure that we carry out relevant checklists, procedures and tasks in the store on a daily, weekly and monthly basis. There are six main purposes of using RiskProof:
- Informs the team about the daily checklists in the store
- Helps us monitor and document all temperature and cleaning tasks
- Secure an elevated safety & hygiene standards in all stores
- Report minor Juicer incidents
- Access HACCP in case of Health Inspection
- Access to different knowledge hubs

All stores have a designated Riskproof iPad in the store.
The log-in & password can be found in in the notes application on the same iPad.
Email: storeID@joejuice.com
Password: Stores Password
Riskproof iPad
Each store has a designated RiskProof with the following apps available.
- RiskProof App: Daily/Weekly Checklist
- Audit Tool: Manager tool
- E-Campus: Quick access to e-campus
- Help Videos: Please note that you need to login to e-Campus, and tap the link again
- Dashboard: Manager tool
- Policies: Find policies for optimal store performance
- Documents: Find important documents such as HACCP, COSHH, Data Sheets, etc.
- Major Injury: Manager must report major injuries
- Minor Injury: Report minor injuries
- Allergens: Find allergen information for our products
- Guest Accident: Manager must report guest injuries
The Riskproof platform contains the entire list of all daily and weekly tasks in store. We normally have two types of tasks in Riskproof:
Pink Standard - Checklists: The daily procedures that ensure the store lives up our safety standards. These tasks will be identical from day to day.
Cleaning Task: Our weekly cleaning task which must be completed within specific time frame. These tasks might vary depending on the day of the week

How to work with RiskProof daily
What the video below to understand your daily responsibilites:
If the RiskProof iPad doesn't work, use the iPad on the Sandwich Station instead.
Where to find important documents for Health Inspections
In case of a Health Inspections tap the "Documents" link to access important documents. Here you'll find the HACCP, COSHH, Data Sheets, etc.

How to report minor incidents
If an accident occurs, you must report the injury using the form found via the "Minor Injury" link. This is essential for management to take the appropriate actions.
Failure to report the injury will prevent management from responding correctly.


Closing Tasks
Deep Clean Centrifuge

Closing Tasks
Espresso Machine Cleaning
IMS Sheets
Find your markets IMS Sheets here
Validation Checklist
Find your markets Validation Checklist here
Appendix: Video
Cleaning Tasks

Clean Seating and Tables

Clean Trash Bins in Customer Area

Clean Bar Bins

Clean Bar Lamps + Speakers

Clean Cleaning Tools

Clean Drains

Clean Floor Panels

Clean Ice Machine

Clean Sandwich Grills

Clean Walls and Pictures

Clean Fridges

Deep Clean Stockroom + Fridges

Clean Bar Filters

Clean Fruit Baskets

Clean Dishwasher

Clean Sinks

Clean Centrifuge Cave

Deep Clean GB5

Transport Wagons
Bar Cabinets
How to handle Cleaning Detergents

Dishwasher Detergent
Cafiza
Multipurpose
IMS Sheets
Find your markets IMS Sheets here
Validation Checklist
Find your markets Validation Checklist here
Validation Checklists
This tool supports in-store training by making learning clear and consistent.
- Validation Checklists track progress and ensure key procedures are trained and completed.
This help new Juicers build confidence and get up to speed faster.
Download and print-out for your market here:
IMS Sheets
Find your markets IMS Sheets here
Validation Checklist
Find your markets Validation Checklist here

Prev
13/
10
IMS Sheets
Find your markets IMS Sheets here
Validation Checklist
Find your markets Validation Checklist here