Music Module 2

In Music Module 1 we learned about:

• The history and usage of music. How whistling and later instruments helped humans to communicate and create art.

• How music can affect the human body to increase focus and creativity for our Juicers and guests.

• How we strive to be the best in all aspects of our business, including our music by carefully selecting what we play, how we play it and when we play it.

• The timing of the different playlists and why it is important that we play a specific type of music in the morning, during peak hours and in the evening.

In Music Module 2, you will learn more about our music community, how we differentiate our playlists and our vision to create our own record label – JOE Records.

Build-a-music-community

In JOE & THE JUICE, we’ve always been extremely demanding of ourselves. This results in us doing more or less everything ourselves, especially when it comes to our music. Our Juicers are our brand, which is why they’re the ones creating our music. Everything from the playlists, to the music we have in our Instagram videos.

Essentially, this means any Juicer in the company can submit as many songs as they want to the Music Manager if they would like something added to one of our playlists. To make sure the brand is kept strong and grows in the right direction, the Music Manager filters the suggestions from Juicers and makes sure the music fits within the framework the brand has created for the music profile.

Ever since Pippo (Philip Finsteen Gjødvad) walked into the first JOE bar in Rue Verte on that fateful day in 2004, the volume of the music was turned up. The music came from their personal iPods and later iPhones and contained music the ‘founding fathers’ liked to listen to. Their common taste in music later became known as “JOE-music” and can often be recognized by its electronic sound, inspired by genres like House.

Today, it is of course very different with the music coming from a commercially licensed music provider. The brand has developed a lot since, and today our music is a mix of the founding fathers’ initial taste and our Juicers’ taste as well. By doing it this way, we ensure our music profile is a healthy mix that ranges from old school to mainstream. This process ensures our music continues to develop with help from our Juicers but stays true to the brand by the hand of an experienced Music Manager.

Inclusion is not just for our guests, but for our Juicers as well. Our Juicers are the brand and for this reason, we want you to choose the music we put out over the speakers in the bars. Approximately 3000 songs are submitted from our Juicers from all over the world every month, which goes to show that the community is very active. As mentioned some of the songs are filtered out and won’t reach the playlists, but when it does, it is a very satisfying feeling for the Juicer who added it, to suddenly hear the tunes of a song they like being blasted through the bars worldwide.

If you’re in doubt as to how you submit songs, just go to the music section on e-Campus and sign up to become a ‘Music Suggester’ then you will gain access to our ‘bank-playlists. Whenever you hear a song you like, simply add it to the appropriate list – that’s it!
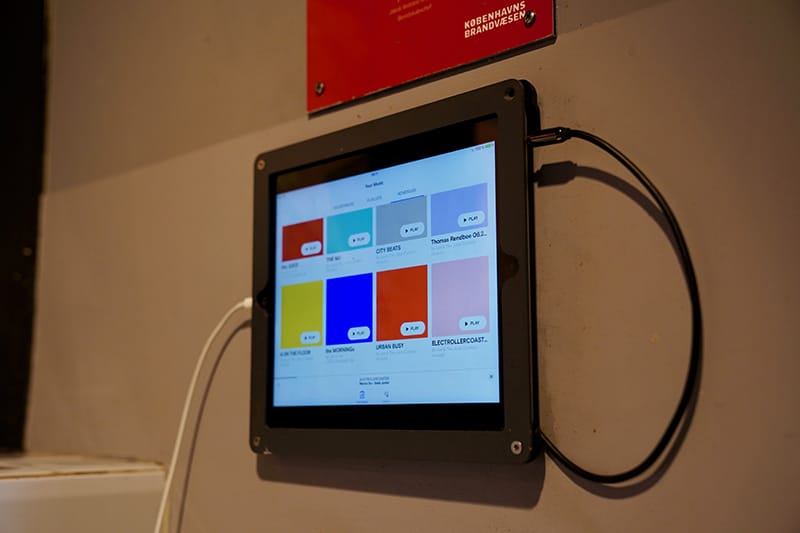
Playlists

Overall our music profile is defined by perceived and felt emotions. Our playlists are the different aspects of those emotions. The frame of a playlist is therefore defined by the selected emotions, which means that it will always have the same feel and sound, even though the trend or music may change.

We’ve discarded the old ways of having a morning, peak and evening list to fit the time of the day.
As we’ve grown, a need to be more selective in our playlists was the natural step to take. With many different geographical locations, it was decided that we would divide our bars into 3 different music segments:

• Urban
• Residential
• Business

Each segment also has two under categories:

• Busy
• Chill

All bars will fall under one of the 3 main music segments and will, therefore, carry a certain vibe that fits the clientele and geographical location.

Urban

Urban bars have a loud and fast atmosphere, with a constant flow of guests throughout the day. These playlists merge the corners of our diversity together in a coherent vibe. With relatable styles from RnB, Hip hop and Dance music, we push the boundaries to provoke the trend and taste in music.

The music played in these bars brings together a variety of:

• RnB
• HipHop
• Dance Music

… to match the energy of the physical environment.

Residential

Residential bars have a calm and casual atmosphere, where we invite our guests to get cosy and stay for hours on end. The location and physical appearance of this kind of bar tend to make our guests stay longer and enjoy their day at a relaxed pace.

Here, you will catch a funky vibe that makes you bend your knees and snap your fingers to the catchy basslines. A constant atmosphere of good-feel with stylish, niche elements from the electronic world of House. The playlists in here contain styles from:

• Deep and groovy music
• Dominating bass lines
• Energetic vocals and rhythms

Business

Business bar, is as the name implies located in busi- ness areas, for example on Wall Street in New York City. Here, people are buried in their work all day and therefore the music is chosen specifically to enhance focus. This is the niche vibe that transcends your body and soul into a constant rhythm of upbeat electronic productions while pleasing your audible senses with soothing basslines.

These playlists mostly contain simple layers of clean electronic tracks which are:

• Fast-paced
• Minimalistic
• Techy

We are very vain about our music and have come to understand that one of the biggest success factors in JOE, is our music profile. Our playlists have evolved with us but kept the original JOE spirit. However, we dare to dream a little bigger as to what the next step should be…


Joe Records

Since JOE opened its doors for the first time in 2002 and until the present day, our music profile has proven to be somewhat unique. Every JQ can listen to a song on the radio and immediately classify it as a “JOE-song”. It is a specific style of sound, which takes a lot of inspiration from House music. It is of high quality, minimalistic and anchors in deep frequencies.

Our regulars can distinguish this too, and we’ve always taken pride in being a ‘music-station’ to our guests, as well as our Juicers. We are broad reaching and still not completely defined, but we’re slowly creating the framework for how and what we define ourselves as.

With this in mind, we want our own record label, so we have absolute control of all of our music in every aspect. We want to create, promote, manage, license, release and play our own music. We want to sign our own artists, and with an army of young and talented people, we don’t have to look far to find DJs, rappers and singers. Being a Juicer is like being an entertainer and maybe that’s the reason why a lot of Juicers have creative minds and a flair for being on a stage.

We want to represent our culture internally and externally by making music for our Juicers and guests. Maybe even in time, host concerts where we invite our guests to come party with us at one of our events – now that’s inclusion.

This concludes module 2, which hopefully gave you an understanding of:

  1. How our music community is a mix of the taste of our founding fathers and our Juicers.
  2. How by adding songs to our JOE playlists on Spotify, you can be part of our community and decide what eventually goes on the playlists.
  3. How our playlists consist of 3 different segments with 2 under categories, built to fit the geographical location and local clientele.
  4. Our plans to create our own record label “JOE Records”, to be self-sufficient and create our own music.

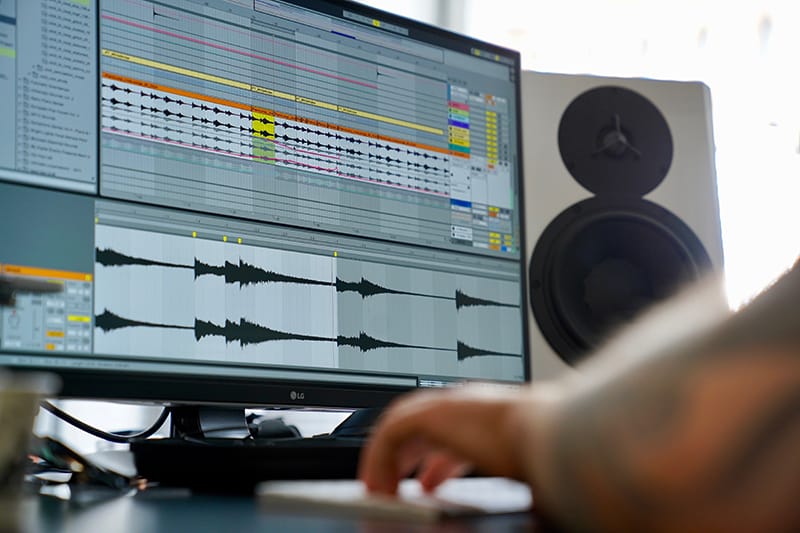
Next up is Music Module 3, where you will learn more about sound design, the technical details as to how music should sound and the equipment that goes into creating this process. This last module will, as mentioned earlier, be a very useful and interesting read for our Juicers who walk around with a little Music Manager in their hearts.


After reading this module you should be familiar with these terms:
E-Campus

E-Campus is our internal online educational platform which provides worldwide access to all information and training material relevant for developing within the MoneyBall. It contains the entire e-learning education from Prospect JQ to Prospect Regional Manager and serves as our Knowledge Bank for references. The overall purpose of e-Campus is to educate, inform & entertain but also to secure our culture as we continue to expand worldwide.

Go to Definition Page →

Start of Day

Every morning the POS needs to be opened. You do so by opening the application on the iPad and pressing ‘Begin day’ button. This should be done as the first step when opening the store in the morning. Follow these steps:

1. Type in the ‘User’ (yourJuicerNumber).

2. Type in the password (1-2-3-4)

3. Count the coins and notes from yesterday and type in the amounts into the POS.

4. Press ‘Sign Begin Day’ and then the POS is ready to take orders.

Daily Card Terminal Scam Inspection Procedure

Go through the following steps:
IF any of the steps below are not in order, unplug the Card Terminal and call your Manager immediately.

Check if the Card Terminal display the word "TAMPER".

The message will look similar to this:

• Check if the Card Terminal is physically damaged.
• Check for missing seals, screws, holes in the device, added wires or labels.
• Check if the Card Terminal shows the Adyen or Joe & the Juice logo on the display after starting up.
• Check if there are any cameras or skimming equipment attached to the Card Terminal
• Check for anything inserted in or attached to the card reader, ports, display, or keypad
-  If the keyboard doesn't feel right—too thick or off-center, perhaps—then there may be a PIN-snatching overlay.
• Ensure that the store staff CAN'T see the guests' PIN code when they enter it on the Card Terminal.

Begin Session

Every time the POS needs to be opened, you open the application on the iPad and press ‘begin session’ button. This should be done as the first step when opening the POS.

Before begin session you will receive a cash drawer with a specifically amount of cash. You will receive the cash draw from your manager.

Follow these steps for opening the POS:

  1. Type in the ‘User’ (your juicer number)
  2. Type in the password (1-2-3-4)
  3. Type in the amounts into the POS
  4. Choose ‘Manager Approve’ and let your manager approve the count
  5. The POS is ready to take orders.

Connect to Printer

The printer will be connected at all times but if it for some reason loses connection first check following two possible issues: 1) If the wire is connected 2) If the iPad is connected with our own network (JJINT).

How to re-connect or setup the printer from scratch:

1. Choose admin button in the top bar in right corner.

2. Choose settings → Choose printers → Choose the printer e.g. TSP134IIIW (STR_T-001).

3. Now wait until it is shown as online → The POS is now connected with the printer through the local network.

Card terminal Set-up

When setting up a new card terminal you will need following 3 things:

• Terminal
• Charger
• Adaptor for the Ethernet cable

Sequence

1. Open the back side of the terminal and plug in the adaptor.

2. Connect the charger with the adaptor.

3. Make sure to plug in the Ethernet cable in the ETH-port on the adaptor.

4. Open settings by pressing 9+Green (at the same time) and enter the password 0856.

5. Press network → Select Ethernet → Enable DHCP → Scroll down and press apply.

6. Press the red button to exit → Press board on the terminal → Scroll down and select store → Press confirm and wait for the terminal to synchronize.

7. Go to settings and press 9+Green → Use same password.

8. Press network and select Ethernet → Make sure DHCP is not activated.

9. Edit the IP Address → Delete the last 3 digits (so there are 6) and replace the deleted digitswith number 10 for the first terminal number 11 for the second terminal and so forth.

10. Press green to save the configuration.

11. Go back to the main screen by pressing red two times.

12. Press menu on the POS → Press settings → Choose CC Terminals → Enable EOD → Press add (+) and choose Adyen API terminal.

13. Press 5+green on the terminal → Take the iPad and scan the terminal QR-code.

14. Press confirm to make the iPad log-in and secure that the terminal is found and log-in succeeded.

15. Make a sample transaction to check if the terminal is connected and working.

Scan & Pay

How to take an order through Scan & Pay:
1. Take the order and type it in on the POS.

2. Let the guest scan the personal QR-code in the app à POS will now register the user.

3. Choose PAY TO GO → Choose JoePay (name is uploaded automatically).

4. Let the guest step aside and take the next order in the queue.

5. As soon as the guest confirms the order on the app it will be uploaded on the List.


Customized Orders

How to type in customized orders:
1. Tap the chosen product to open the plus (+) and minus (-) list. Choose to add or remove ingredients → All possible customizations for each product are available here → Choose DONE to get back to the main overview.

2. All products need to be customized independently on the POS. The POS can only register one customized product at a time. This also counts for an order of two identical products with the same customization.

3. When the entire order is done use same procedure for name and payment as a regular order.

Examples:

A guest orders 2 identical items – e.g. 2 x Tunacados and wants to customize one of the items – e.g. 1 without tomatoes:

1. Choose Tunacado → Open customization list → Remove tomato (Choose –tomato) → Choose DONE → Then choose one more (normal) Tunacado.

A guest orders 2 identical items – e.g. 2 x Tunacados and wants to customize one of the items – e.g. 1 with extra Jalapenos/Tabasco:

2. Type in the customized item first → Then the regular item → In that way it will appear correctly on the List and the guest will only pay for one extra topping.

Comment Function

We use the comment function when there is an extraordinary message to give to the Juicer making products. The comment will then appear on the List so extra requests can be fulfilled. You can use the comment function in two ways:

Single product comment:
1. If a guest e.g. wants the bread to be toasted extra crispy → Type in the comment by opening the comment section above the customization list.

Whole order comment:
2. If the guest e.g. is an older lady and the order should be handed to her table → Type in the comment by opening the tab next to the customer name

Discounts

We have got 3 different kinds of discounts:

Neighbour Price

is only a possibility if a deal has been setup between the neighbours and JOE. Ask your Bar Manager or Regional Manager if you are in doubt of whom to give neighbour discount or see it HERE.

1. When the order is placed tap the discount tab → Choose Neighbour Price → POS calculates the discount price → Type in name and take care of payment.

Employee Meal

is the discount we use when redeeming items being on shift.

2. When the order is placed tap the discount tab → Choose Employee Meal → Type in Juicer number → Choose PAY TO GO → Choose either CARD or CASH (You can choose both when the amount being paid is 0).

Joe Price

is the discount we use when Juicer’s not being on shift are ordering products.

3. When the order is placed tap the discount tab → Choose Joe Price → Type in Juicer number → POS calculates the discount price → Choose PAY TO GO and choose how the Juicer wants to pay.

Sustainability Discount

If a guest brings their own cup for their coffee, we will apply a 10% discount on their order.


Return Order

How to return an order:

Credit Card Refund

1. Tap the return icon in the top right corner on the POS

2. Select "BY CARD" to make a credit card refund

3. Let the guest register their credit card on the card terminal and then select the order that the guest want to get a refund on. Please note that you can only return orders that have been made on the same POS

4.Type in your juicer number then your password (1+2+3+4 as standard)

5. The order has now been refunded to the guest's credit card

Cash Refund

1. Type in the order (the products that needs to be returned) → Tap the return icon in the top right corner

2. Select "BY CASH" to make a cash refund.

3. Type in your Juicer number → Type in the password (1-2-3-4 + enter)

4. Now explain in a short sentence why the order needs to be returned → Choose Approve return → Give back money to the guest

Remove items from an order

1. The guest wants to cancel an item → Swipe the item to the left → Choose Remove.

Cancel a Transaction

How to cancel a transaction:

1. When order is placed tap the CANCEL button → Choose Back → Choose Yes.

2. Now you will get back to the order overview.

– If the guest wants to cancel the whole order remove the items by following “Remove items from an order”.

– If the guest wants to add another item to the order type in the item and proceed to payment again.

How to redeem a Loyalty Card (Physically)

How to redeem a Loyalty card on the POS:

1. Type in the order → Let the guest scan the Loyalty Card on the scanner.

2. Type in name → Choose PAY TO GO → The price will be calculated by POS → Now there are two possible outcomes:

1. Loyalty card does not cover the entire order → The guest needs to pay the remaining price → Choose CARD or CASH.

2. Loyalty card covers the entire order → Price will be 0 → Choose either CARD or CASH (optional) to place the order.

Sell/Activate a Loyalty Card

When a guest wants to buy a physical Loyalty card we need to activate and sell the card before the guest can redeem and use the card.

Follow these 2 steps:

1. Activate the respective Loyalty card by scanning the card → The price will be shown on POS → Use same procedure as a normal sale → Type in name → Choose payment method (CASH/CARD) → When finishing the sale POS will show “Loyalty – Redeeming – Success” in the left corner to indicate that the card is activated.


2. Take the order following same procedure as “HOW TO REDEEM A LOYALTY CARD”. When scanning the newly purchased Loyalty card there should be 10 items left.

How To Return a Loyalty Card

You can only return a Loyalty card if it is purchased on the same day in the same store. Follow these steps:

1. Choose the admin button in the top bar of the right corner → Choose Transactions → Scroll through the transactions and select the receipt of the specific purchase.

2. Tap the return button in the top bar of the receipt → Choose Yes to approve the return → Give back money to the customer.

Regular Order (1 sandwich, 1 juice & 1 coffee)

How to take a regular order:

1. Choose the juice icon to open the juice options → Select the juice e.g. a Go Away Doc→ Choose size: small or large.

2. Choose “the main” to get back to the main overview.

3. Choose the sandwich icon to open the sandwich options → Choose the sandwich e.g. a JOE’s Club → Choose THE MAIN to get back to the main overview.

4. Choose the coffee icon to open the coffee options → Choose the coffee e.g. a Yellow latte.

5. Now the order is made → Choose PAY TO GO to go further.

6. Type in the guest’s name → If you don’t know how to spell it and the name isn’t suggested by the POS spell it phonetically → Tap OK to get further to payment.

7. Choose CARD (No terminal) if the guest wants to pay by card → The terminal is connected to the POS and notifies you when the payment has gone through → Activate the next guest and start taking the order while the payment is going through.

Choose CASH if the guest wants to pay by cash → Type in the amount of money the guest is paying with → The POS calculates the amount of money you need to give back to the guest.

*NOTE:
Some of the outdated juices we do not have on the menu anymore can still be purchased. On the POS they are listed on the second page of the juice options. If a guest orders an old juice that cannot be found in the old juices section it is simply because we cannot make it anymore. All recipes for the old juices can be found in the Product Manual on e-Campus in the ARCHIVE section.

To-go (Packaged)

How to mark the order TO GO (packaged):

1. When the order and name is placed → Choose the TO GO tab in the Packaging selection → Take care of payment.

2. The TO GO symbol will then be shown on the List so the Juicers making products know that the order should be packaged.

To-Stay (Porcelain)

How to mark the order TO STAY (porcelain):

1. When the order and name is placed → Choose the TO STAY tab in the Packaging selection → Take care of payment

2. The TO STAY symbol will then be shown on the List so the Juicers making products know that the order should be packaged.

End of Session

The End of Session (EOS) is really important. All the sales made through the shift needs to be uploaded and registered and that only happens if you follow the correct procedures every single time.

Follow these steps for closing the POS (EOS) correctly:

  1. Choose the admin button in the top bar in right corner
  2. Choose End of Session →  Choose your name (user) → Type in the password (1-2-3-4)
  3. The manager will confirm the EOS by type in the password
  4. The manager will confirm the summary by choosing the print tab
  5. Choose ‘Manager Approve’ in the left side of the POS
  6. The manager will confirm the summary by type in the password

EOD (Close POS)

Closing the POS properly is really important. All the sales made through the day needs to be uploaded and registered and that only happens if you follow the correct procedures every single time.

How to close the POS (End of Day) correctly:

1. Choose the admin button in the top bar in right corner.

2. Choose End of Day → Choose your name (user) → Type in the password (1-2-3-4).

3. Type in the Drawer to bank amount (the notes that we deliver to the bank) → When done and the amount is double-checked press Tap to Continue.

4. Fill out the Drawer to bank slip and put the notes in the Bank bag → Tear off the bar code and place it in the small pocket inside with the barcode facing outwards → Place the bank slip in the larger outside pocket.

5. Take a picture of the Drawer to bank bag with the slip facing upwards so you can see the amount on the picture.

6. Type in the bag id number placed underneath the barcode → Press Tap to continue.

7. Type in the amount paid by credit card (this slip will be printed automatically) → Upload a picture of the credit card payment slip → Choose Tap to continue.

8. Type in the End cash (Money left in the till) → End the day by pressing Sign EOD → Print out the End of day receipt.

9. Now collect and save the following 3 receipts: 1) Drawer to bank slip 2) Credit card slip 3) End of day receipt. Your bar manager will have a structure regarding how to save the slips.

* NOTE:
When uploading the pictures make sure to have following things in mind:

1. The picture needs to be readable so make sure the receipts are in focus.

2. When taking the picture of the drawer to bank bag make sure following are readable with in one picture:

– Total amount
– Amount of each note
– Appendix number
– Bar code number

Good Examples

Bad Examples

End of Day

How to handle a Till Difference

A till difference is a result of poor till handling throughout the day. The difference can be caused by handing out wrong amounts of money to the guest but often it is caused by counting mistakes when closing the POS. In case you have got a till difference when closing the POS follow these steps:

1. Re-count the End of day cash and see if you find any mistakes.

2. If the amount is correct re-count Drawer to bank and see if you find any mistakes.

3. If the mistake has been found choose RECOUNT and type in the new (correct) amounts → The difference will then be corrected.

4. When everything is counted once again and the reason causing the difference has not been found yet proceed with the following: Take pictures of End Cash Drawer to bank and Card payments including the different slips and attach the pictures in an email to your Bar Manager with an explanation of the situation → When that is done press Sign EOD.

Key things to remember

  1. Always check the ID if someone visits your store who is not a customer. Confirm that the visit was planned with your manager.
  2. If anything seems suspicious with your terminal setup, contact your manager & get a replacement.
  3. If you find a credit card, call the number on the back & then cut the card in small pieces to safely dispose it!

Card Terminal Scam Inspection

Go through the following steps
IF any of the steps below are not in order, unplug the Card Terminal and call your Manager immediately.

Check if the Card Terminal display the word "TAMPER".

The message will look similar to this:

Start of Day

• Check if the Card Terminal is physically damaged.
• Check for missing seals, screws, holes in the device, added wires or labels.
• Check if the Card Terminal shows the Adyen or Joe & the Juice logo on the display after starting up.
• Check if there are any cameras or skimming equipment attached to the Card Terminal
• Check for anything inserted in or attached to the card reader, ports, display, or keypad
-  If the keyboard doesn't feel right—too thick or off-center, perhaps—then there may be a PIN-snatching overlay.
• Ensure that the store staff CAN'T see the guests' PIN code when they enter it on the Card Terminal.

Monthly Check

Verify that the payment terminals S/N matches POS configuration.

1. Locate S/N on back of terminal device

2. On POS: Go to MENU -> Settings -> CC Terminals

3. Verify Connected terminals matches S/N from terminal

If S/N doesn’t match stop using the device and contact your manager

If you find a lost creditcard:

  1. Call the number on the back of the credit card and report it lost
  2. Cut it into small pieces and make sure to destroy the chip
  3. Discard the pieces of the card

NEW TERMINAL:
1. If a new terminal is received you will validated that it is actually from JOE – check with manager (manager are ordering terminals)
2. You should always check validity of people before allowing them to replace or work on your terminals. – It is always an authorized Joe Employee which installs terminals. Typically, Doc – If you see something suspicious -> contact your manager.

STOLEN / LOST TERMINAL:
1. Contact your manager which will follow the process for lost / stolen devices

Where to find the Commercial KPI Report

The Commercial KPI Report is found in the menu on the POS.